Tuesday, August 24, 2010

Girls Ruffled Socks

My daughter is almost 8 and still just ADORES anything pink, sparkly and/or ruffly.  She also LOVES wearing dresses and skirts--its sometimes a fight to get her to wear a pair of jeans!  (What is wrong with her?  Her Momma LOVES jeans!!  Oh well!)  Because she often wears socks with her little skirts and dresses instead of hot, itchy tights (see--she really is my daughter!) I decided to jazz things up and bring some of those ruffles down to her feet!  


I got the idea to do this a couple of years ago--and made her a couple pairs of socks--but I just sewed some lace to her socks with regular thread--and forever after they were SUPER hard to get her feet into--as regular thread does not stretch!!!  Duh. 

So--When I was using ELASTIC THREAD for the SHIRRED DRESS and SHIRRED BEACH COVER UP that I made--I got the idea to use the elastic thread for her socks too!  Brilliant, I know.  Why didn't I think of this before?

So here is how I made them.

I started with the elastic thread that I was just talking about:


And I hand wound it around a bobbin until it was full.


Next I found two coordinating colors of knit fabric (I happened to find some great knit shirts at the Dollar Store--so I used those).


I cut a couple strips of the outer fabric 3" wide.  The inner fabric I cut about 2 1/2 " wide--on the hot pink one I cut it about 1" wide--you can make them whatever width you like.


Next I layed the narrow strip of fabric in the middle of the wider strip of fabric.
(Notice my cutting is not perfect--as I was cutting thru a shirt--but it doesn't matter--it all gets gathered up and you never notice).


Next I sewed a basting stitch (set your machine to the longest stitch length) using your elastic thread in the bobbin--sew down the center of your strips.  I like to backstitch at the beginning--but don't backstitch at the end--instead leave yourself a little tail of threads. 

Here is what my stips looked like after basting:


Cute--but I wanted a little more ruffles--so I pulled the little tail of elastic bobbin thread--until it looked like this: (Sorry about the shadowy picture--DARN CAMERA PHONE!!!)


After getting the ruffles as full as you like them--I tied a knot in the end of the threads to help keep them in place.

Next I pinned the ruffle in place on the sock.  Her socks were the fold over kind--so I made sure to place it on the part that was folded over (so you actually sew it to the inside side of the sock).  I always start pinning in the back of the sock so the seams are less noticable.


Then I pinned the ruffle all the way around the sock.  I made sure to lay the edge of the sock so that I would catch it when I sewed along the same line of basting stitches.  Also--you don't need to pull or stretch the sock or the ruffles at all--just lay the ruffle nicely on the sock and pin it where it lays.

At the end I had a tail:

I simply cut it off about 1/2" longer--then folded the edge and pinned it down--overlapping the first edge that is already pinned down. 

The great thing about working with knit fabric is that you can leave these edges raw and they won't fray. 

Next I sewed the ruffle onto the sock.  I used another basting stitch with the elastic thread again.  This ensures that it will have enough stretch in it for your little girl to get her foot into the sock!  (TRUST ME--THIS PART IS IMPORTANT!)  However--Backstitch Well at BOTH ENDS.  This will keep it securely attached to the sock.

I sewed right on the same line of stitching.

I trimmed my threads and I was done!


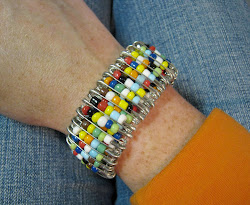
These make a little Girl's Feet VERY Happy!

Linking up to THESE parties.

Wednesday, August 18, 2010

Nursing Covers

By the way...Have I ever mentioned before--that I make and sell Nursing Covers? 

My AWESOME sister--Michelle--started making them several years ago in Canada.  Her little home based business just took off and she became an instant success and people from all over Canada started ordering her covers. 

I got my Bachelors Degree in Home Economics Education--and so have I taken and taught my fair share of sewing classes and have sewn a lot--and had always dreamed of doing something like my sister was doing--SO a couple years ago I asked her if I could be a copy cat and try my hand at making the covers to sell down here in the states.   

These covers are currently the only thing that I make to sell. I have my own website and everything!  I REALLY need to try it out in the ETSY market--and I REALLY need to make a little button for my sidebar linking to my website.  But I am a better seamstress than I am a computer genius--and so here I sit with no button in my sidebar...but SOMEDAY I'll figure both of these things out.

But for now--I will just leave you with some pictures and the link to my website (which--by the way--I did create myself--with one of those build it yourself website hosting services--BUT STILL!)

OK--Here are some Pictures:

Inside Pocket for Nursing Pads or other Essential Items:

All wrapped up ready to be mailed out:

Peek-a-Boo Label:


So go check it out and let me know what you think! 
(And if any of you are computer Genius's and want to help me create a button...I would love you forever!)

Oh--and THANK YOU Michelle Rae--for letting me be a big COPY CAT!  I Love you from the bottom of my Boogity Boogity Shoe!  (Don't ask--its a Sisters thing!)

Thursday, August 12, 2010

Toy Story Birthday Part 2

Ok-- Now that my laundry and other mommy chores are finished--I can finish my post about Landon's Toy Story Birthday.

So back to how I made this Pinata:

So I first got my inspiration and idea HERE from Kalleen's blog AT SECOND STREET. (This gal is a genius!)

So We start with a cardboard box (at my house those usually come in the form of a Diaper Box).

I decided I wanted a round disc shape for my pinata--so I found the perfect size bowl to trace onto my cardboard.

I cut out two circles--and then just cut all of the box fold tabs off at the fold line (by using these as my sides--I didn't have to do any measuring or anything cause they are already the exact same size as each other.)

Then I taped the sides onto the front and back circles.  (If you are going to do this--BE SMARTER THAN ME and put the Diaper Box Writing on the inside NOT the outside!!!  It will make it easier down the road when you are trying to cover said box!)

I would also use REGULAR SCOTCH TAPE.  I used packing tape--not covering the whole thing--I tried to leave spaces to create weak points so that it would break when hit--but the packing tape is pretty strong--so this was a little hard to break.  So just use the regular stuff--it will work better.


Then I cut a little door at the top for the candy to go in.


Next I went around covering the Diaper Box Surfaces with paper--to create a base for your decorations to go on top.  You would still do this even if you had DONE IT RIGHT and put the writing on the inside--but it would be easier to cover as some of my writing kinda showed thru (It didn't end up mattering anyways--as all the other decorations covered it--but STILL--You could sleep better at night knowing that you did it the RIGHT WAY!)


Next I ran a line of white glue where I wanted my crepe paper to go--and then I just lay your crepe paper on top and kind of fold it and scrunch it into gathers as I went.

(See the blasted writing?  AARRGGG!)

Then I repeated that step covering all the sides.


Next I used the same clip art that I used for the invites (I like the idea of using Clip Art--that way you can make a pinata for ANY occasion or theme!).  I printed out two copies--nice and  large so it would fit on the pinata front and back.


I glued them on the center of the circles.


Next I did the same technique as before and glued and scrunched all the way around both the front and the back making a border around the picture.


And this is it! 
(Oh yeah--my hubby poked some holes in the top to string wire thru to hang--but I don't have  a picture of that).


Then my little helpers filled the pinata (and their belly's) with candy and prizes.
(Oh--and if you have never filled a pinata before--just a note--it is best to use soft/chewy candy instead of suckers and other hard candies.  We learned that the first year when all of the broken shards of candy came out of the pinata all over our garage floor.  So go with soft candy!)


Now that the pinata was finished--I moved on to the cupcakes. 

HERE I found the greatest idea and tutorial for AWESOME Toy Story Cupcakes.

They Look like this:

And this:


Next we did a little decorating--I loved using the toys we already have!! 
How much easier can you get?


To serve the food, I just used simple red cups, plates and napkins from the dollar store.  I rarely buy the ones with characters on them--cause I hate having the extras floating around my cupboards--and then when I want to take a plate of cookies to a friend or neighbor--they have to get them on a princess plate!  So I go with plain colors.


I also printed out a coloring page of all the Toy Story characters.  Each child chose and colored one and then we taped them on to the back of their chairs and played musical chairs.  When the music stops--instead of taking out a chair and making some one "OUT" (Which doesn't EVER go well with a bunch of 4 year olds), I choose a character name out of a hat and the person who happens to be sitting in that chair gets a prize.  We keep playing till everyone gets a prize.  Fun Times.


Then we hung the pinata on our swing set outside. 


 Next we lined everybody up youngest to oldest so everyone gets a turn to have a whack at it.


Then everyone had a whack at it!
Some with blind folds--some without.


Once it was broken we passed out little bags for everyone to gather the goodies.


Next it was time for presents.


And cake:


Meanwhile little brother was laying claims on the new toys!  
He had a death grip on these babies--let me tell you! 


And whew!  Another birthday can be crossed off the list for another year! 


Happy Birthday my Landon! We love you!


Linking Up to These Parties.
Related Posts with Thumbnails